Monday 30 April 2012

Trouser Pockets


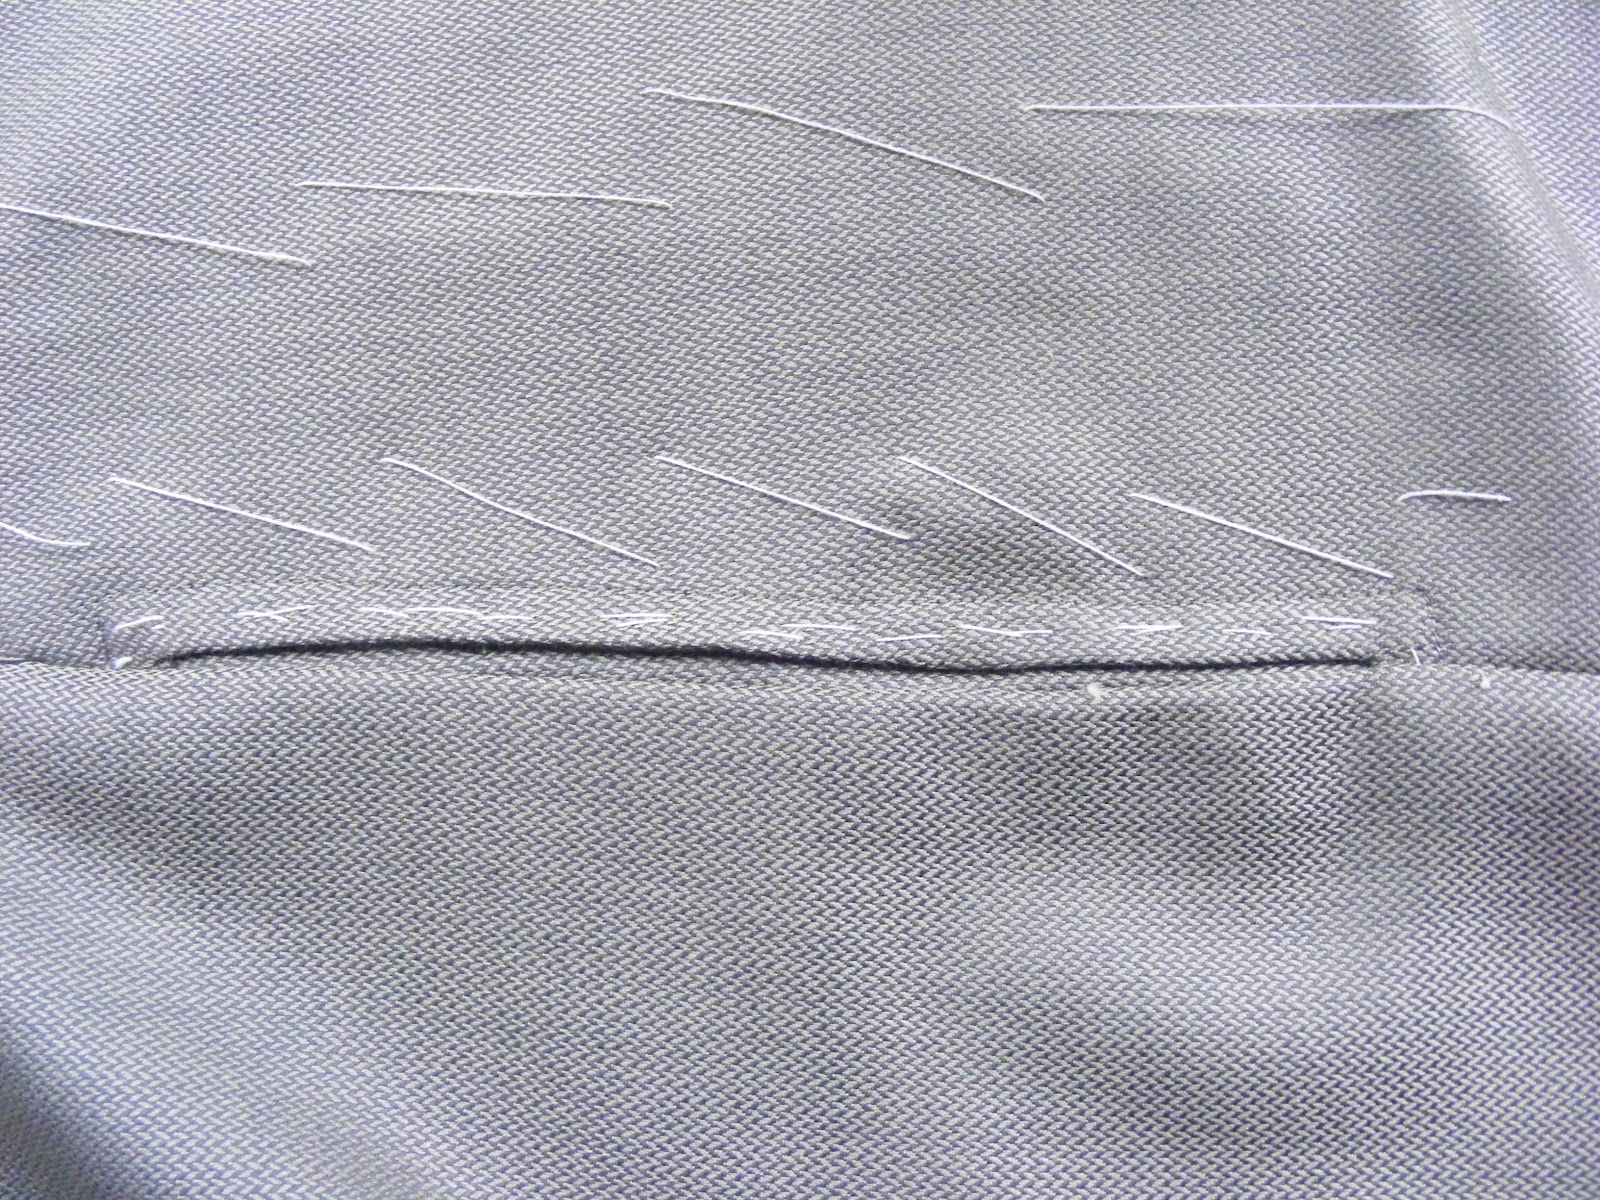
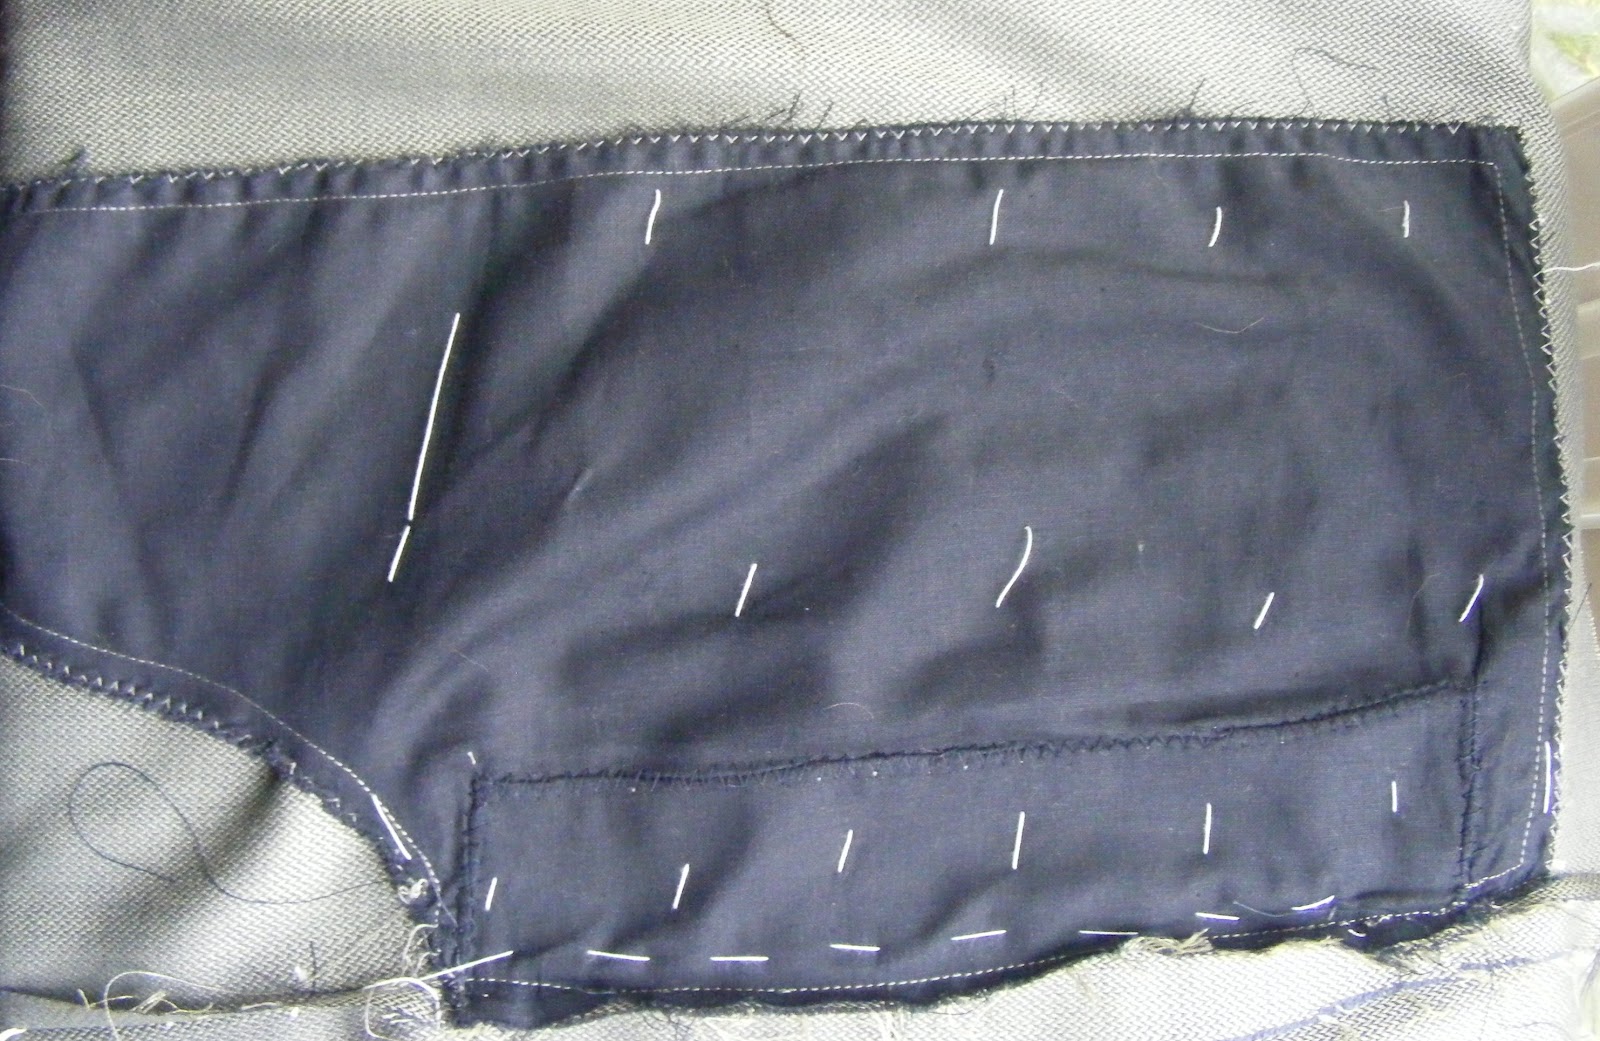
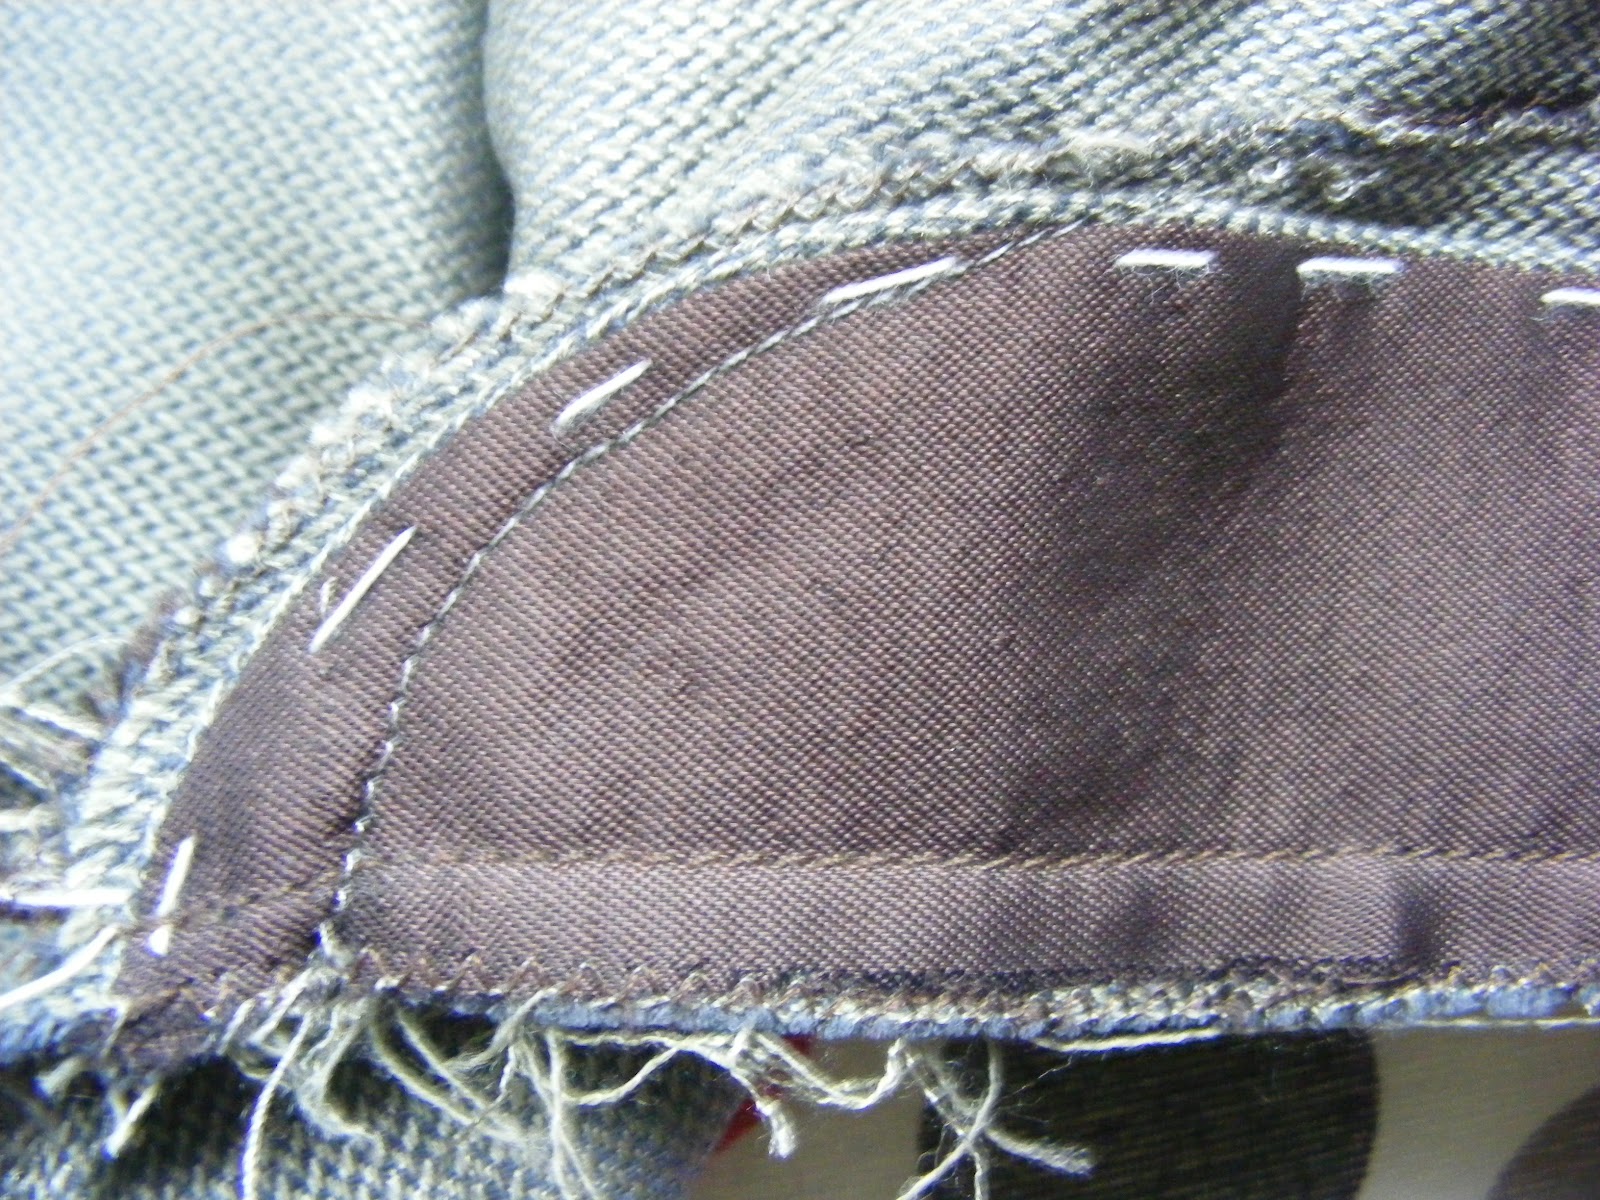
When it came to sewing my trouser pockets together I remembered the mistakes made on my sample and made sure that I used my resolutions to achieve  a better pocket. As shown above in the middle photo I made sure the tension of the bobbin was right before zigzagging around the facing, this has achieved a more profession finish and a smoother finished pocket without any ridges, distortion or decreasing of the pocket size.

I also deiced to use my lining fabric instead of the pocketing as this is what I used in my jacket and I want the two to connect.  

I made sure the my tacking was equal along the mouth making a perfectly shaped mouth, which I am happy with on both pocket, which match in the same curved shape.

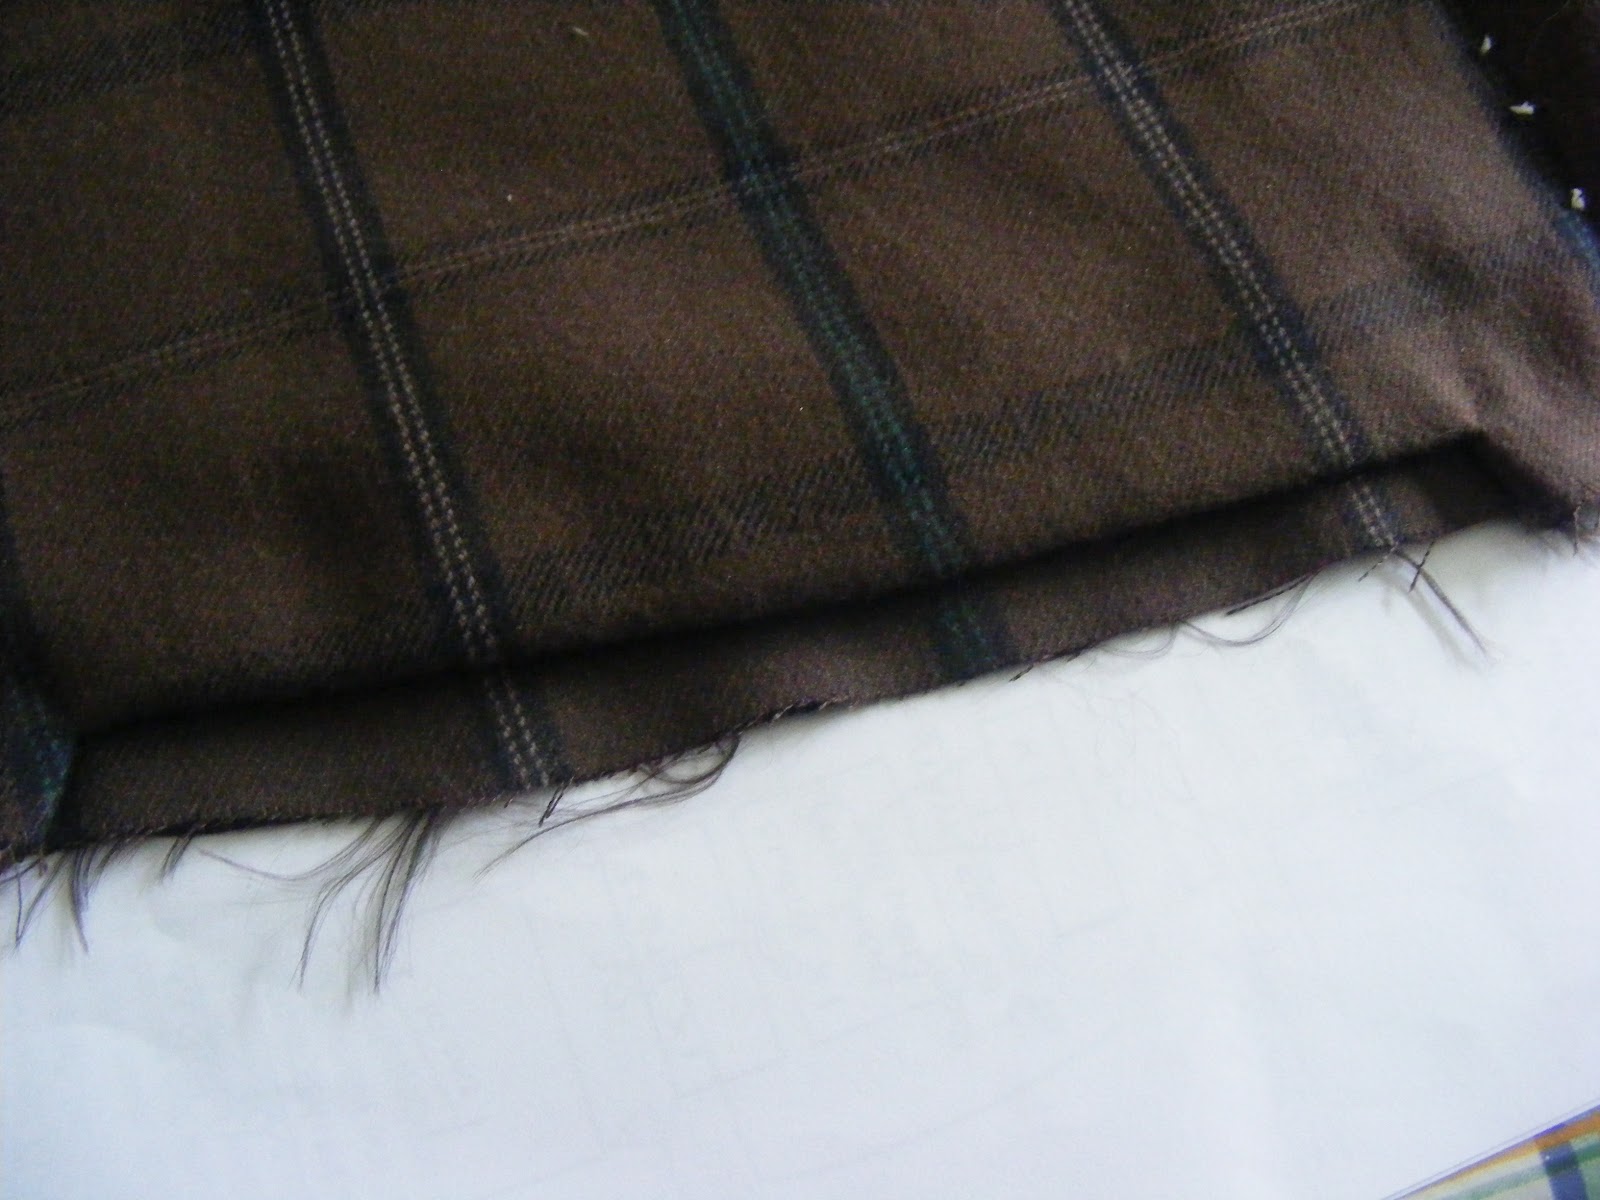
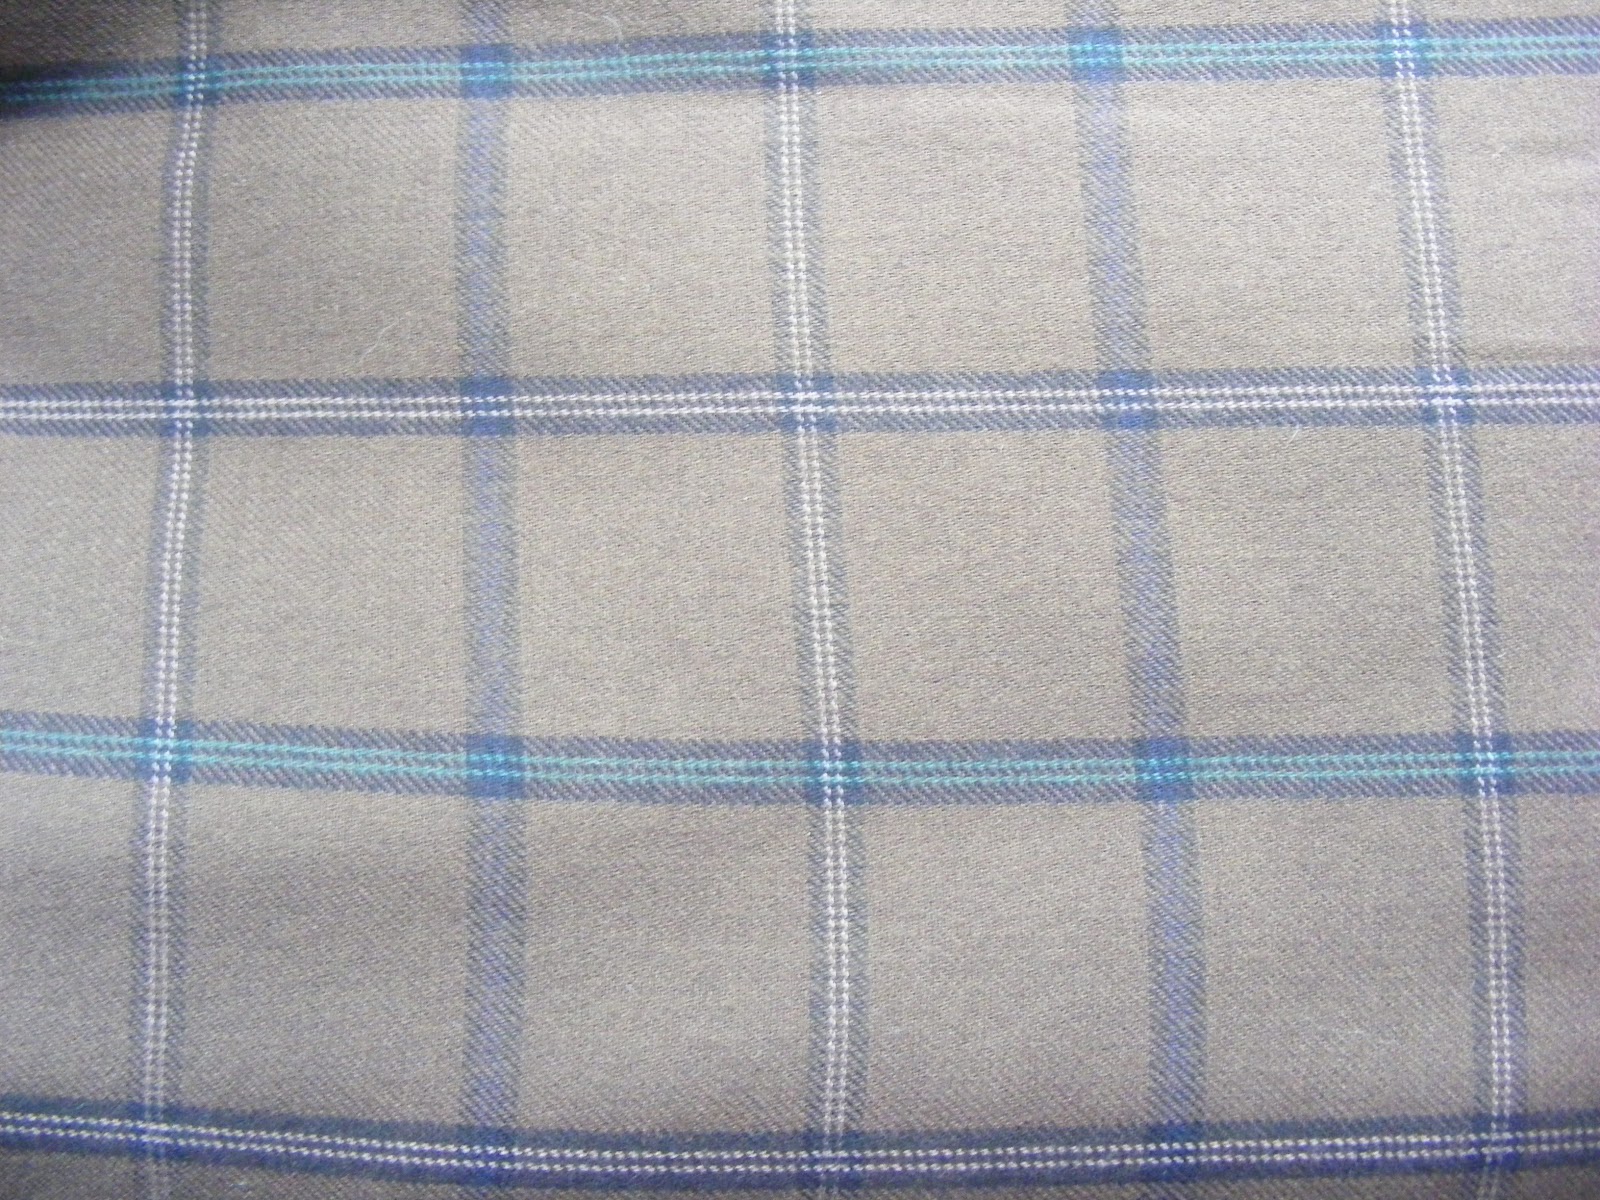
I faced more of challenge when constructing the pockets on the trousers as I had to match the checks wrapping around the body (horizontally). Matching the two facings inside the trousers to the outside trouser leg. To do this I found it easiest to do calico cut outs of the facings and then mark on the check lines, I then used this as a pattern on the cloth. This worked well for the first facing sewn on (the one furthest away from the body) as horizontal lines would have gone off at an angle instead of wrapping round in a straight line. 
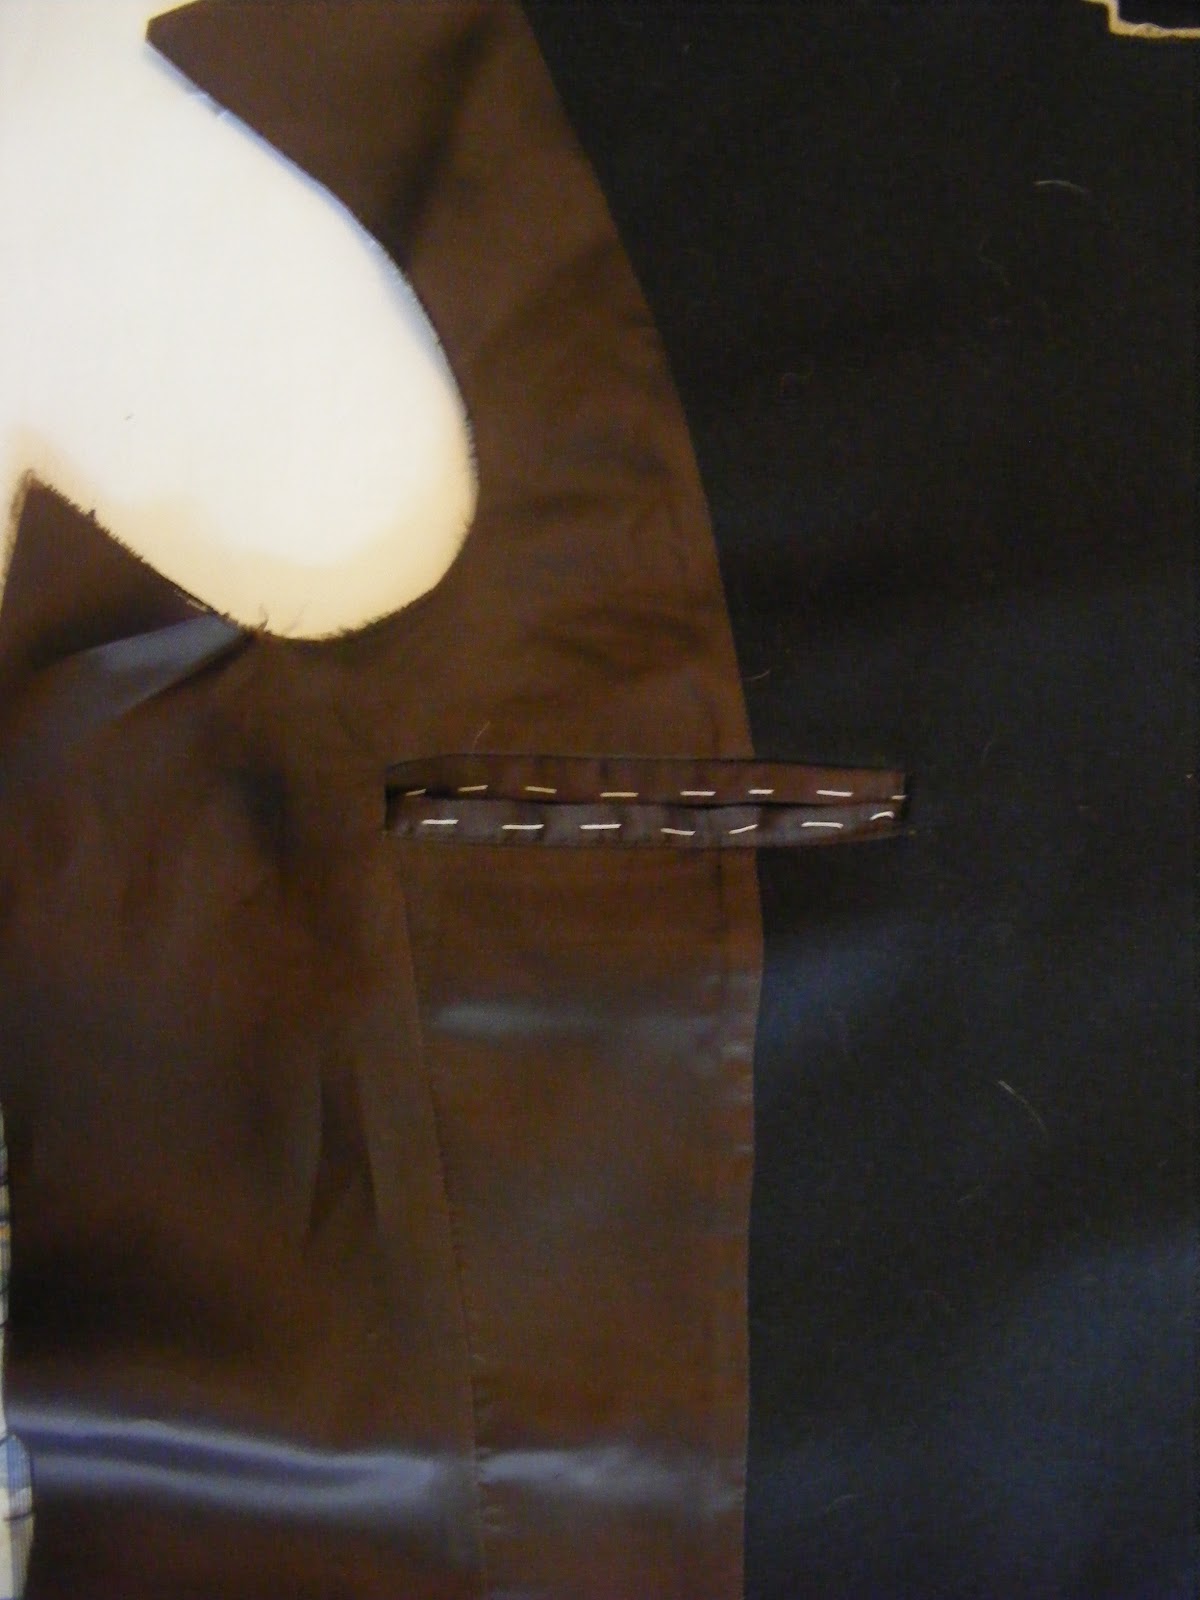
However, for the facing add last (the one closest to the body) I used trouser leg to match up the pattern so when sewn together they are the same, with continues matching of lines. I found matching the two different facings in this way that they both land up the same, matching inside to each other across the horizontal line, with the pattern flowing into the top cloth matching.  

Overall I am very happy with my trouser pockets, though the true finishing of the pocket will be decided when I sew the back trouser leg to the front along the side seam.


Sunday 29 April 2012

Inside Pocket


After canvasing the lapel, I trimmed the SA away on the CF on the canvas and left an SA of 0.75cm on the wool and stayflex around the CF line. I then created the step in the lapel which situates the position of the collar in relation to the lapel. For this I used my image below to determine the size. I used the man on the right of the picture as this is the jacket I am making. a
As you can see the lapel is quite small in comparison to the normal lounge jacket and that of later jackets. Lapel is about half size in comparison to the collarl, so I created the step at this point. I then created a step at the bottom of the jacket where the facing join would be.

This was  a good point to check that both sides of the lapel were matching, I had to change one side about 2mm moving the lapel out making it larger. They should now be identical.

Once I did this I made my facing making the overall shape 0.5cm bigger allowing extra fabric for movement. The front panel is both cloth and lining, the cloth starts about 2/3 along the shoulder and curves around the front, then after the chest the line straightens out. On the lining I have sewn in the dart. This is shown in the top photo. After this I created the inside pocket (jet pocket), this was done on the left hand side of the jacket facing as my model is right handed. The pocket is under the armhole has a mouth size of about 13cm and is about 15cm deep.

I thought that this pocket would be harder to sew as I deiced to make it completely from the lining material, which is commonly done for the inside pocket. However I was surprised when I found it easier to sew, mainly due to the fact that it is much thinner and there is no bulk. It was also much easier to form the jets. Though  sewing some parts it was hard to sew completely straight as the lining is slippery and moved when on the machine. I found by pinning more helped to stop this, though tacking the lining would also have worked. 


I am slightly concerned that the stayflex at the back of the pocket can be seen on the lining on the front. In future for the inside pocket I will use no stayflex or a much thinner strip, lessening the amount seen.

I am becoming more confident when sewing pockets and am starting to enjoy the process I put this down to practice, and hope through repeating the processes in the future I want have to think about and read before sewing. 


The finished pocket is shown on the top photo, I have now tacked the pocket down to stop it from moving, so I am ready for the next step.


Saturday 28 April 2012

Midway Evalution

So far I am really enjoying the tailoring processes. I have already learned a great deal of new technical skill which have help to further my knowledge and skills within tailoring and construction of costumes for the future. I feel that I have already developed from Defining Practice, through knowledge of historical tailors patterns and how they have developed over time, the period cut of garment, my own accuracy in constructing parts like the pockets and specific tailoring skills like the pad stitching on the lapel and canvasing. I am looking forward to learning new skills to advance my knowledge and technique through next half of the project. 

I feel that the pocket didn't go as well as i would have liked mainly due to the bulkiness of the flap though I hope this can be improved in the future through practice, like most skill based techniques. I have enjoyed the pad stitching of the lapel, due to its cleverness and manipulation of the fabric to achieve the desired shaping of the lapel.

Through my current progress, I think my garment is historically accurate through cut and design as well as construction. I have made sure that I keep looking back at my chosen image to make sure the design lines are the same as well as the cut. I have used historical measurements for parts like the jets and lapel. I am however disappointed that my Mackenzie weathered tartan wouldn't have come in time, as I would have made my garment truly historically accurate. Though I have made the best of this choosing a heavier fabric as well as Scottish fabrics in colours that they would have used. I will continue to try and make the garment as historically accurate as I can, through the help and guidance of my tutor and research.  

I think my work is going well in time schedule to the amount of time left , being about half way through the project,  I am about half through construction. I have kept up with my work keeping to my weekly schedule making sure I'm ready for the next steps and not falling behind. My work has been organized to plan and so far accurate to the tailoring techniques and finished article. I will continue to schedule for the weeks ahead and keep to my independent time frames, to work more independently in the future, which I am looking forward to. I feel that I have already developed skills in this area and through the coming weeks of the project will be ready for more independent work next year. 


Overall I think tailoring is going really well I have enjoyed the experiences so far and have learned a vast amount. I am looking forward to the coming weeks and finished 2 piece suit. I will continue to blog my progress. 

Trouser Pockets and Fly Sample

Today we did some really quick workshops on pockets and the concealed fly for the trousers. I decided to do a sample of both having not done either before and due to the fact that our session wasn't very long. It has allowed me to make the mistakes on the sample, rush through them so I can learn the techniques and then sew them at a steadier pace, more accurately and carefully on my actual trousers. 
Below are photos of the sample:
The first is the fly closed. In the second is the fly open, the chalk line shows where the buttonholes would go. Then the third, the fly is open, the left side is where the buttons would sit.The fourth shows the pocket from the front finished with the back of the trouser shown on the side seam. The fifth shows the reverse of the trouser.


I rushed through the pockets sample are some clear mistakes can be seen:

The the mouth of the pockets is not completely straight or in keeping with the curve, this was because when I tacked the seam rolling in it wasn't done evenly, making the distorted shape. This is easily remedied with accuracy on my actual pockets.

On the back of the pocket, the zigzagging of the facing on the pocketing wasn't at all good, the tension was wrong meaning it pulled the pocketing into the fabric, not only decreasing the size and shape it also looks unprofessional. With more time I can sort the tension on the machine bobbin, creating a neater clean finish, without distorting and decreasing the pocketing.
I am much happier with my fly sample and there isn't much that I would do different. 

I also think that the back panel when sewn to the front finishing the side of pocket, could be sewn a bit closer to create cleaner, sharper look. I will have have to watch that I don't sew the seam in with the pocket mouth closing its entrance. Though with accuracy, more time and practice I am sure I can achieve this on my trousers.

I am however very pleased with the fly, I think it came out very well, accurate, clean and well shaped. One concern I had was with the final step machine from the front creating the sewn line seen. Before you reach the curve you pull the left plaque through to sew through when going around the curve, of course you can't see what your doing at this point to the pulled through plaque. Although it did sew through this plaque and the overall shape works well from the front, it looks accurate from the back, as it hasn't followed the same shape. Shown below: 
Perhaps with more practice it will resolve this problem or through slightly increasing the size of the left plaque or even pulling the plaque up on the uprights and pinning in place. When sewing the fly on the trousers I will try these resolutions and see what works best. I will then blog my findings. 

I will do my trouser pocket and fly on Sunday. I will face a greater challenge as I have tartan fabric and will need to be matched. This will take more accuracy and precision and I will take my time to make sure I achieve the best result.


Friday 27 April 2012

Fitting

The tailor fitting is quite different to theater fittings, the tailor doesn't have much SA for movement is the garment doesn't fit.  Due to the skill, accuracy and judgement of the tailor  the garment should fit through accurate measuring and making. For tailor's the fitting allow the customer or actor to change any design area to their personal taste or to the designers.   

Although I am unable to have a fitting with my model, I looked in on a fitting to learn what needs to be looked at and the changes that would be needed to be made. 
 
Starting with the trousers, for the style we are making, they should feel relaxed with support(braces are worn with these trousers), they should be high waisted, with no creases at the front and have narrow legs compare to later trousers. (The crease in the front of the trousers can into fashion in the late 1920's). 
You should look for the break at the bottom of the leg. (This is were the material naturally creases). 
Then check the length, they should hit the bottom back of the shoe. You can then shape the hem,  from the back to the front. The front is normally shorter as the shoe is higher.

On the Jacket normally having the sleeves in for a fitting, you start by pinning where the buttons would go together. 

Go to the back and make sure the CB line is straight and that the top of the jacket is smooth across the back to the arm. Then check that it isn't distorted, if so find where and note how it can be changed. For example, if there is any bulk areas around the armhole, the armhole front does not scoop out enough at the front. This can be pinned to a new line. Though try not to make the armhole larger as it will restrict the movement of models arms. If the model is unsure about the armhole you can snip into the SA to show the finished armhole to reassure the wearer.

Then look at the hems checking it length, the hem can be tacked  before the fitting. Change if need be.

Of course there are different things that need looking at for different styles and garments.

Wednesday 25 April 2012

Canvasing the Lapel


The photos above show the stitching and shaping of the lapel when finished.

Starting by tacking on black cotton tape along the break line was important as the break line is set on the bias of the fabric and without would distort the fabric. By doing this I has meant that I have forgo-ed any future issues. Also by tacking on the cotton tape along the break line I could pull the tape creating dips in the fabric, on these parts I have back stitched. (This is only done on the middle part of the breast felt.) I found this stage quite hard to get the right amount and found myself doing it several times on the first half. Though having made the mistakes of doing to much then to little, it was much quicker and easier the second time round. It was important to get this stage right as too much would not iron out and too little wouldn't have the desired effect. By creating these dips it will keep the garment close to the body, as it would otherwise bow on the lapel. This on it own was extremely useful to learn and is a technique than I will keep in mind for the future and use.

I  have also learnt a different type a pad stitching when sewing the canvas to the lapel. Basically it is the same stitch though smaller (about 1cm long) in matching thread to the top fabric. However, when sewing the stitch a very small amount of push is added to the fabric towards the break line using your thumb. You then feed the needle through with your finger to the top fabric and prick, catching a pin prick of fabric then back through, repeating the process to the CF chalk line. Though at the top corner changing the stitch at on opposite diagonal. (As show on the top photo.) By using this technique it manipulates the fabric of the lapel automatically folding the fabric back on itself , even when ironed the shape is still held and goes back how it was, stopping the lapel from sitting wrongly or folding back. The top corner is at a different angle stopping the corner from folding out. I enjoyed this part of the process and has a real positive effect on the garment, it was also a really useful manipulation technique to learn and is a key tailoring skill.
I didn't face any problems at this point though if I did push the canvas too much, ridges could have been formed and when ironed would have created ridges, the only real remedy to this would be to unpick and start again.

Canvasing the lapel is a new technical skill that I have learnt. Overall it wasn't as difficult as I thought it was going to be though is very clever, I am glad to have learnt it.

Schedule 26th April


Monday 23 April 2012

Trousers

I have cut and mark stitched my trousers. I have now to zig-zag around the edge as the trousers they won't be lined, to stop them from fraying due to general wear and tear. Tailors don't use an over locker due to the small seam allowance. 
When I zig-zagged around the edges I found that this distorted the fabric slightly even using the longest stitch, I solve this with ironing the fabric, making it flat again. Though by zig-zagging this may have distorted the tartan lines making harder to match. I will have to deal with this if it arises.

Friday 20 April 2012

Canvas

I have added canvas into a garment before in Defining Practice, but for the jacket I have needed to further my knowledge and skill in canvasing. The canvas in the period jackets play an important role in the maintenance of the garment, style and overall look on the model. In the jacket I am making I have added three layers of different canvasing, hair canvas, shoulder canvas and breast felt. These three layers will give the jacket a smooth fit from the hollow of the male shoulder to the chest, creating overall smooth shape of the models chest area.

I have learnt a new skill of pad stitching the canvas together, this could of been done by machine but pad stitching is a skill I wanted to learn. The length and width of the stitch varies the overall finish of the garment. If I was making a Dress Jacket or Dinner Jacket the pad stitching would be small and close together, by doing this it would mean that the canvas would become stronger. Therefore, the finished garment would have a harder front over the chest giving it a good shape.
Whereas ,I am making an everyday style jacket the pad stitch is larger and further apart (about 2.5cm long and the same apart), still creating the shape but in a more relaxed, casual style.  

A different technique is used for attaching the canvas on to lapel, which I hope to learn next week.  I have done some research into this and it seems to be the same technique as the other canvasing though you roll as you stitch. The lapel has to be handled carefully to create a well shaped lapel. 

Below is a diagram that I found will researching canvases: 

Wednesday 18 April 2012

Jacket Pockets

I've made a pocket sample before doing the pockets on my jacket, I altered different parts of the pocket as stated in the pocket sample post. These developments worked successfully and there is no gap in the side of the jacket showing the jets. 

I am however concerned that the flaps are to small, though the longest parts measures 5cm. If I was to make this again in the future I would make the flaps longer as it looks quite odd for the design. Though I can not find any historical photo or other types of image to back this up, only on lounge jackets where the flap would have been 4-5cm, the pattern blocks are not to dissimilar.

I did have some issues with the bulkiness of the flap, braid and jet SA when tacking over to create the shape of the jet. I tried cutting the different layers at different length to create a graduate decrease in seam, hopefully making is easier and smoother when turning through. This worked perfectly on one side, creating a smooth jet at 0.75cm, though did work so well on the other where you can still feel the braid through the SA as it is so bulky. 

Other than these points the overall look of the pockets has worked well, they both are the same size, proportion, shape and site in the same place symmetrically.   

I was going to add a breast pocket into the jacket, though doing research and looking at photos and artwork of the style of jacket, as well as reading the pattern block instructions and information, there is no breast pocket on this style of jacket. So to keep jacket historically correct I have decided not to add the breast pocket. The welt pocket is not a new process for me as I have made these before in Defining Practice, the only difference is that it would be smaller in length (historically around 9cm).   


Schedule 19th April

Tuesday's schedule has been changed as I have a hospital appointment but I am still hoping to go to the tutorial.

Monday 16 April 2012

Pocket sample

I have now cut out my jacket in top fabric and mark stitched, it was time to start my pockets. I have never done a pocket with a flap on before so I decided to a sample first so I could work out the best way to construct the pocket. For the sample I have done a jetted pocket with a flap, shown below:


I was told by my tutor Graham that the size of the flap shouldn't be any deeper than 4-5cm so I chose the larger size as it looked more in proportion to the jacket and style, although I can not see clearly on my chosen images the size of the pocket flap. (I am mainly going by the Tweed Kilt Jacket pattern block).  The size of the jets historical should also be about 0.75cm where as the modern jet is 0.5cm.

The majority of my sample went  well, there are a few things that I will take forward and change when doing the pockets on the jacket. The main being there is a small gap of about 0.5cm from the flap and the side of the fabric probably because  when I made the flap I rolled in the seam with a tack to push the seam inside. In doing so this decreased the size of flap creating the gap. To resolve this I will add the 0.5cm on the flap equaling doth sizes to create a larger flap, with no gap when sewn in.

I also decided  placing the braid on the pocket  looked a bit odd because of the brown next to the blue. So I decided to change the braid to a navy blue and thinner as this looks more professional and historical for this jacket style and is what they would have done. I also found from doing some research of, the modern version of this jacket, the braid has been replaced and now a pleat is made in the fabric.

Saturday 14 April 2012

Calico Jacket

I wanted to check the fit of the jacket as I will not have the chance to do a fitting, this also give me the opportunity to alter the pattern before cutting out in top fabric.

Here are some photos of the calico jacket on my model:

The CF sites in the right place as I have added an extra allowance of 4cm. The jacket length also has the extra seam allowance, and will sit in the correct place for the style of the jacket as it quite short. I was concerned about the size of the armhole for the jacket to compensate a waistcoat though taking out the SA totaling 4cm, it will give plenty of room.    

The side seam bottom is left open as it has a side slit.


The back also fits correctly.


Week of 15th April Schedule


I will know in more detail what to schedule for Friday and Saturday after Thursday's session.

Friday 13 April 2012

New Chosen Fabric

I have had a really successful day! 

I managed to find a 'Brown Scottish Hunting Tartan' They did not  know to what clan it belonged to, though they expect that it is a general Scottish tartan that anyone can wear (This was told to me by the shop assistant who happened to be Scottish!). Unfortunately it does not feel like a 14oz wool, it is thinner, though it still has a strong weave and is thick enough historically not be mistaken for the modern suiting wool. (From researching I found that the weight of wool historically depends on season, though they still wouldn't be as thin as modern suiting wool.)

I then managed to match the navy blue in the tartan to a plain navy blue wool in the second shop, which will blend nicely with the navy blue in the tartan. This is thicker and feel more around the 14oz. Both fabrics are 100% wool and Scottish! It would have been better to have the same ounce of wool for both, though the match is more important. 

I am very happy with my brought fabric, historically a navy blue was used for the 'Tweed kilt Jacket' and the tartan, although not the Mackenzie looks similar and is brown like most of the Scottish hunting tartans. I would have been good to have purchased a Mackenzie tartan and would be more historically correct but I think that this is the next best option.

While I was in the shop I also managed to buy a brown lining, thread and braid, and was also able to go to the Haberdashery at university to purchase hair canvas, shoulder canvas, breast felt and stay-flex. All in all the day has been very productive and allows me to start making my costume!

I have started to source buttons, historically I want stag horn or leather. 

Here are photos of my chosen fabrics, braid and buttons:

 This is my navy blue fabric, this photo shows darker than it really is:

This is the hunting tartan, I did find a green to match the green in the tartan, though it was just to bright historically to be right.
This is the brown lining for both the trouser and jacket, its thick so your hand can not tbe seen underneath or through it. Although the jacket is navy blue I chosen the brown to blend the brown more into the costume:
This is the braid I also brought this in brown to blend the brown of the tartan into the jacket:
Below is a combination of all the fabrics:
Here is a photo of some stag horn buttons, they all vary because of their natural substance:


Thursday 12 April 2012

Change of 9th April Schedule

Due to the cancellation of all my fabric the rest of my schedule for this week has been changed. It goes as follows:

Friday: Source fabric for Jacket, trousers top fabric, lining, braid and start to source buttons.
             Haberdashery to buy Hair Canvas, Shoulder Canvas, Breast Felt and Stay-flex.

Saturday: Blog brought fabric, make Calico jacket and alter pattern in needed.

Sunday: Cut out jacket and trousers in top fabric, mark and flat tack. 

Fabric

I was expecting my fabric today though have just received an email from the supplier, which have unfortunately told me that the fabric I ordered will now not be available until the 28th May, giving me no explanation why.  I have quickly contacted other suppliers, who are unfortunately out of stock and it would take 6-8 weeks to receive the fabric, just my luck! 

Undeterred, I have decided to go fabric shopping again tomorrow to try and find a hunting tartan and matching plain fabric for the jacket. I realize that the likeliness is really small, so I have a second plan to do the whole costume out of a Scottish tweed/wool. I have two main shops, from looking to match the Mackenzie tartan fabric, that I know sell Scottish fabrics, so I will visit them first. 

Monday 9 April 2012

Week From 9th April Schedule

This is my schedule for this week, of course this will change if my fabric does not arrive by Saturday.

Monday 2 April 2012

Chosen Fabric

After ordering the fabric sample I have spent the last week, trying to match the Mackenzie hunting tartan. I had no luck in London or in the local area as the brown and green is a muted colour and was hard to find a good match. Most shops also did not know the weight of the fabrics, though I  over came this as I had my 13oz tartan to compare them to.

 I phoned the supplier of the tartan, who were able to provide me with details of a mill that specialize in matching the tartans to the plain wools, as well as being 'Scotland's last artisan tartan weavers'. They also do the Mackenzie reproduction fabric which is the hunting tartan, which would have been worn historically and would give the best match. I have chosen to do it in brown, though I could have chosen any colour on the tartan. I also managed to find the fabric surprisingly cheap at £20.99 from a different supplier in Scotland. As I am ordering through the internet I've asked for a sample first, though due to the Easter holidays and bank holiday the orders are slow, and ideally I would like to start making my costume next week. So instead of ordering samples I have just ordered the fabric. This is estimated to be delivered by Thursday 12th April.

Here are some photos of the my fabric, taken from the D.C. Dalglish website (this is the mill, and is not where I have brought my fabric from) :

The plain is for the jacket and the tartan for the trousers.


After doing the research into the Mackenzie clan it aided me in the choosing of the fabric (Mackenzie hunting tartan and muted brown) and button (stag horn due to the Mackenzie's relation with the stag and their clan badge). It has also given me a great sense historically of the Mackenzie's tartan, past and fashion. I hope to bring my research into my costume to give it a true historical feel.